Start an App, Then Add Features
When you have no code yet, start an app. Shep creates an empty project, and the app’s first feature works out the requirements and the stack with you before writing code. In this tutorial you start an app, approve its plan, run it locally, add a second feature, and publish it to GitHub.
Time: about 15 minutes of your own steps, plus the agent’s time. You need: Shep installed and an agent set up (see From zero to a merged PR). No repository: Shep creates one.
Describe the app
Describe what the app should do, not which technology to use:
shep app new "A booking tool for a small yoga studio: class schedule, sign-ups and a waitlist"You should see something like:
✓ App started
  ID:      7c1d2e3f-…
  Name:    Booking Tool Small Yoga Studio
  Slug:    booking-tool-small-yoga-studio-3f9a1c
  Path:    /home/you/.shep/projects/booking-tool-small-yoga-studio-3f9a1c
  Status:  Idle

Next steps
  Follow the first feature: shep feat show 4b5c6d7e-…
  Add a feature: cd /home/you/.shep/projects/booking-tool-small-yoga-studio-3f9a1c && shep feat new "<what to add>"
Note two ids: the app id on the ID: line, and the first feature’s id in shep feat show …. The project folder is a new git repository under ~/.shep/projects/, named after your description plus a random tag.
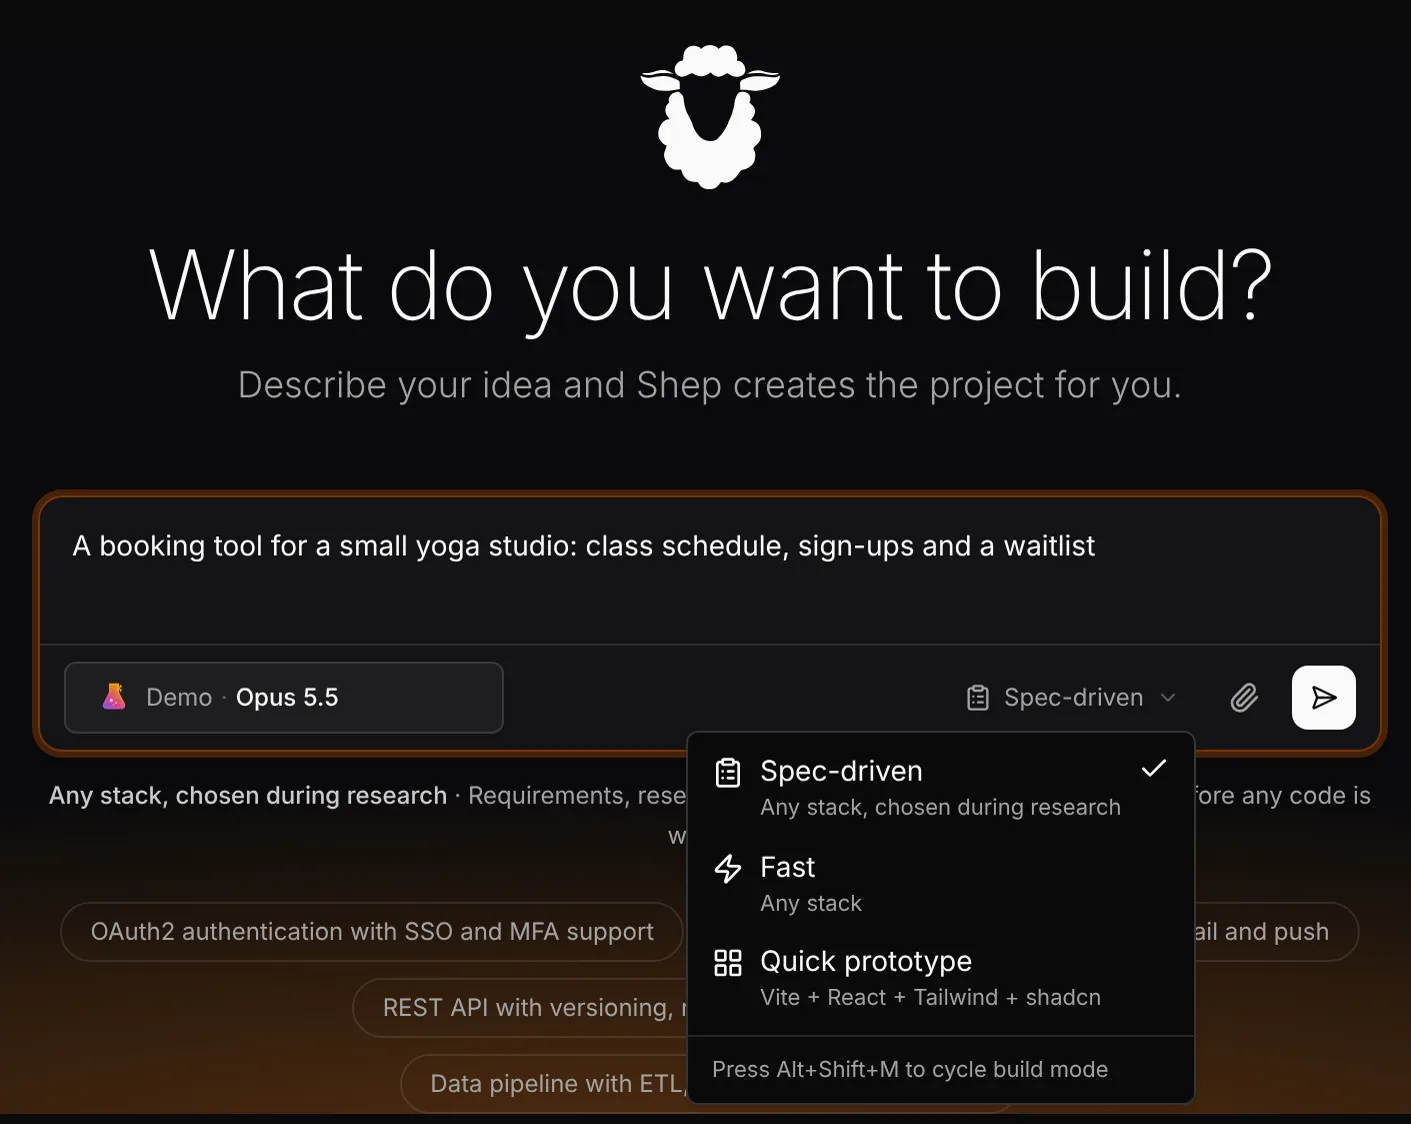
Prefer the browser? Open Apps in the sidebar, type the same description, keep Spec-driven selected, and send it:
Approve the requirements
The first feature is spec-driven. Wait for its first gate:
shep feat wait <feature-id>You should see it stop at the requirements gate. Answer the questions and approve, either in the terminal:
shep feat review <feature-id>or in the feature’s PRD Review tab in the browser. If something is missing, reject with a reason, for example shep feat reject <feature-id> --reason "Members pay per class, no subscriptions".
Approve the plan and the stack
shep feat wait <feature-id>You should see it stop at the plan gate. This is where the agent proposes the stack. Read it in the feature’s Tech Decisions tab, or in the spec files under specs/ in the feature’s worktree. Approve it:
shep feat approve <feature-id>Or reject it with the stack you want: --reason "Use SvelteKit and SQLite".
Merge the first feature
The agent now builds the app. Wait for the merge gate:
shep feat wait <feature-id>The app has no GitHub remote yet, so there is no PR: Shep skips the push and, when you approve, merges the feature branch into the app’s main locally.
shep feat approve <feature-id>You should see the feature reach Completed, and the code on main in the app’s folder.
Run it
shep dev start --app <app-id>--app needs the full app id. Shep works out the command to run, installs dependencies, waits until the server answers and prints the URL.
You should see the stages (analyzing, installing, booting, ready) and a localhost URL. Open it. Press ctrl+c to stop following the output; the server keeps running. Check it later with shep dev status --app <app-id>, and stop it with shep dev stop --app <app-id>.
If Shep picks the wrong command, see Dev servers.
Add a feature
Run shep feat new from the app’s folder, and the feature attaches to the app:
cd ~/.shep/projects/<app-slug>      # the Path: that shep app new printed
shep feat new "When a class is full, let people join a waitlist and email them when a spot opens"
This one runs in fast mode, the default, so it goes straight to code. Try it before you approve the merge:
shep dev start --feature <id>Use the full feature id here. That starts the dev server in the feature’s worktree, so you test the change without touching main. Then approve with shep feat approve <id>.
In the browser, use Add feature on the app’s page, or + New on the app’s repository in the Control Center.
Publish it to GitHub
When you want pull requests:
shep app git create-remote <app-id>This creates a GitHub repository for the app and pushes it, using your signed-in gh. From then on, shep feat new … --push --pr in the app’s folder opens a draft PR for each feature, like in any other repository.
Variant: a quick prototype
For a web prototype you want to click through quickly, skip the spec phase and start from the Vite + React + Tailwind + shadcn template:
shep app new "Landing page for a bakery" --starter vite-shadcnThis starter builds the app from the conversation, with a live preview in the web UI, instead of creating a first feature. The command prints Watch it build in the web UI: shep ui. In the browser, pick Quick prototype in the build-mode menu.
To skip the spec phase but keep any stack, use --fast instead.
Troubleshooting
shep dev startcan’t find the app or feature.--appand--featureneed the full id, not a prefix.shep app lsandshep feat lslist them.shep feat newdidn’t attach to the app. Run it from the app’s folder, thePath:thatshep app newprinted.- The dev server doesn’t start.
shep dev logs --app <app-id>shows its output. Pin the right command withshep dev plan set. create-remotefails. Sign the GitHub CLI in withgh auth loginorshep app cloud-providers github-login.
What’s next
- Start an app: starters, the Apps page, deleting and deploying apps.
- Dev servers: how Shep picks the command, and
.shep/dev.json. - Gates, decisions and checkpoints: more on steering a spec-driven feature.