Your First Feature
This is a step-by-step walkthrough from “I have a git repo” to “I have a merged PR” — using Shep for the boring parts and your AI agent for the actual coding.
Before you start
Make sure your prerequisites are in place. See Getting Started for the list.
You’ll know you’re ready when:
node --version          # v22 or higher
git --version           # any modern version
gh auth status          # logged in
claude --version        # or cursor / gemini
…all return without errors.
1. Pick a repo
Any git repo works. For your first run, pick a project where you can ship a draft PR safely — your own playground repo is ideal.
cd ~/projects/my-app2. Start Shep
shepIf this is your first time, the setup wizard runs. It asks:
- Which agent? — Claude Code is the default and most-tested.
- Which IDE? — VS Code, Cursor, Zed, etc. Used by the dashboard’s “Open in IDE” button.
- Default workflow? — Recommended: enable push and PR, leave merge manual.
When the wizard finishes, the daemon starts and the dashboard opens at localhost:4050 .
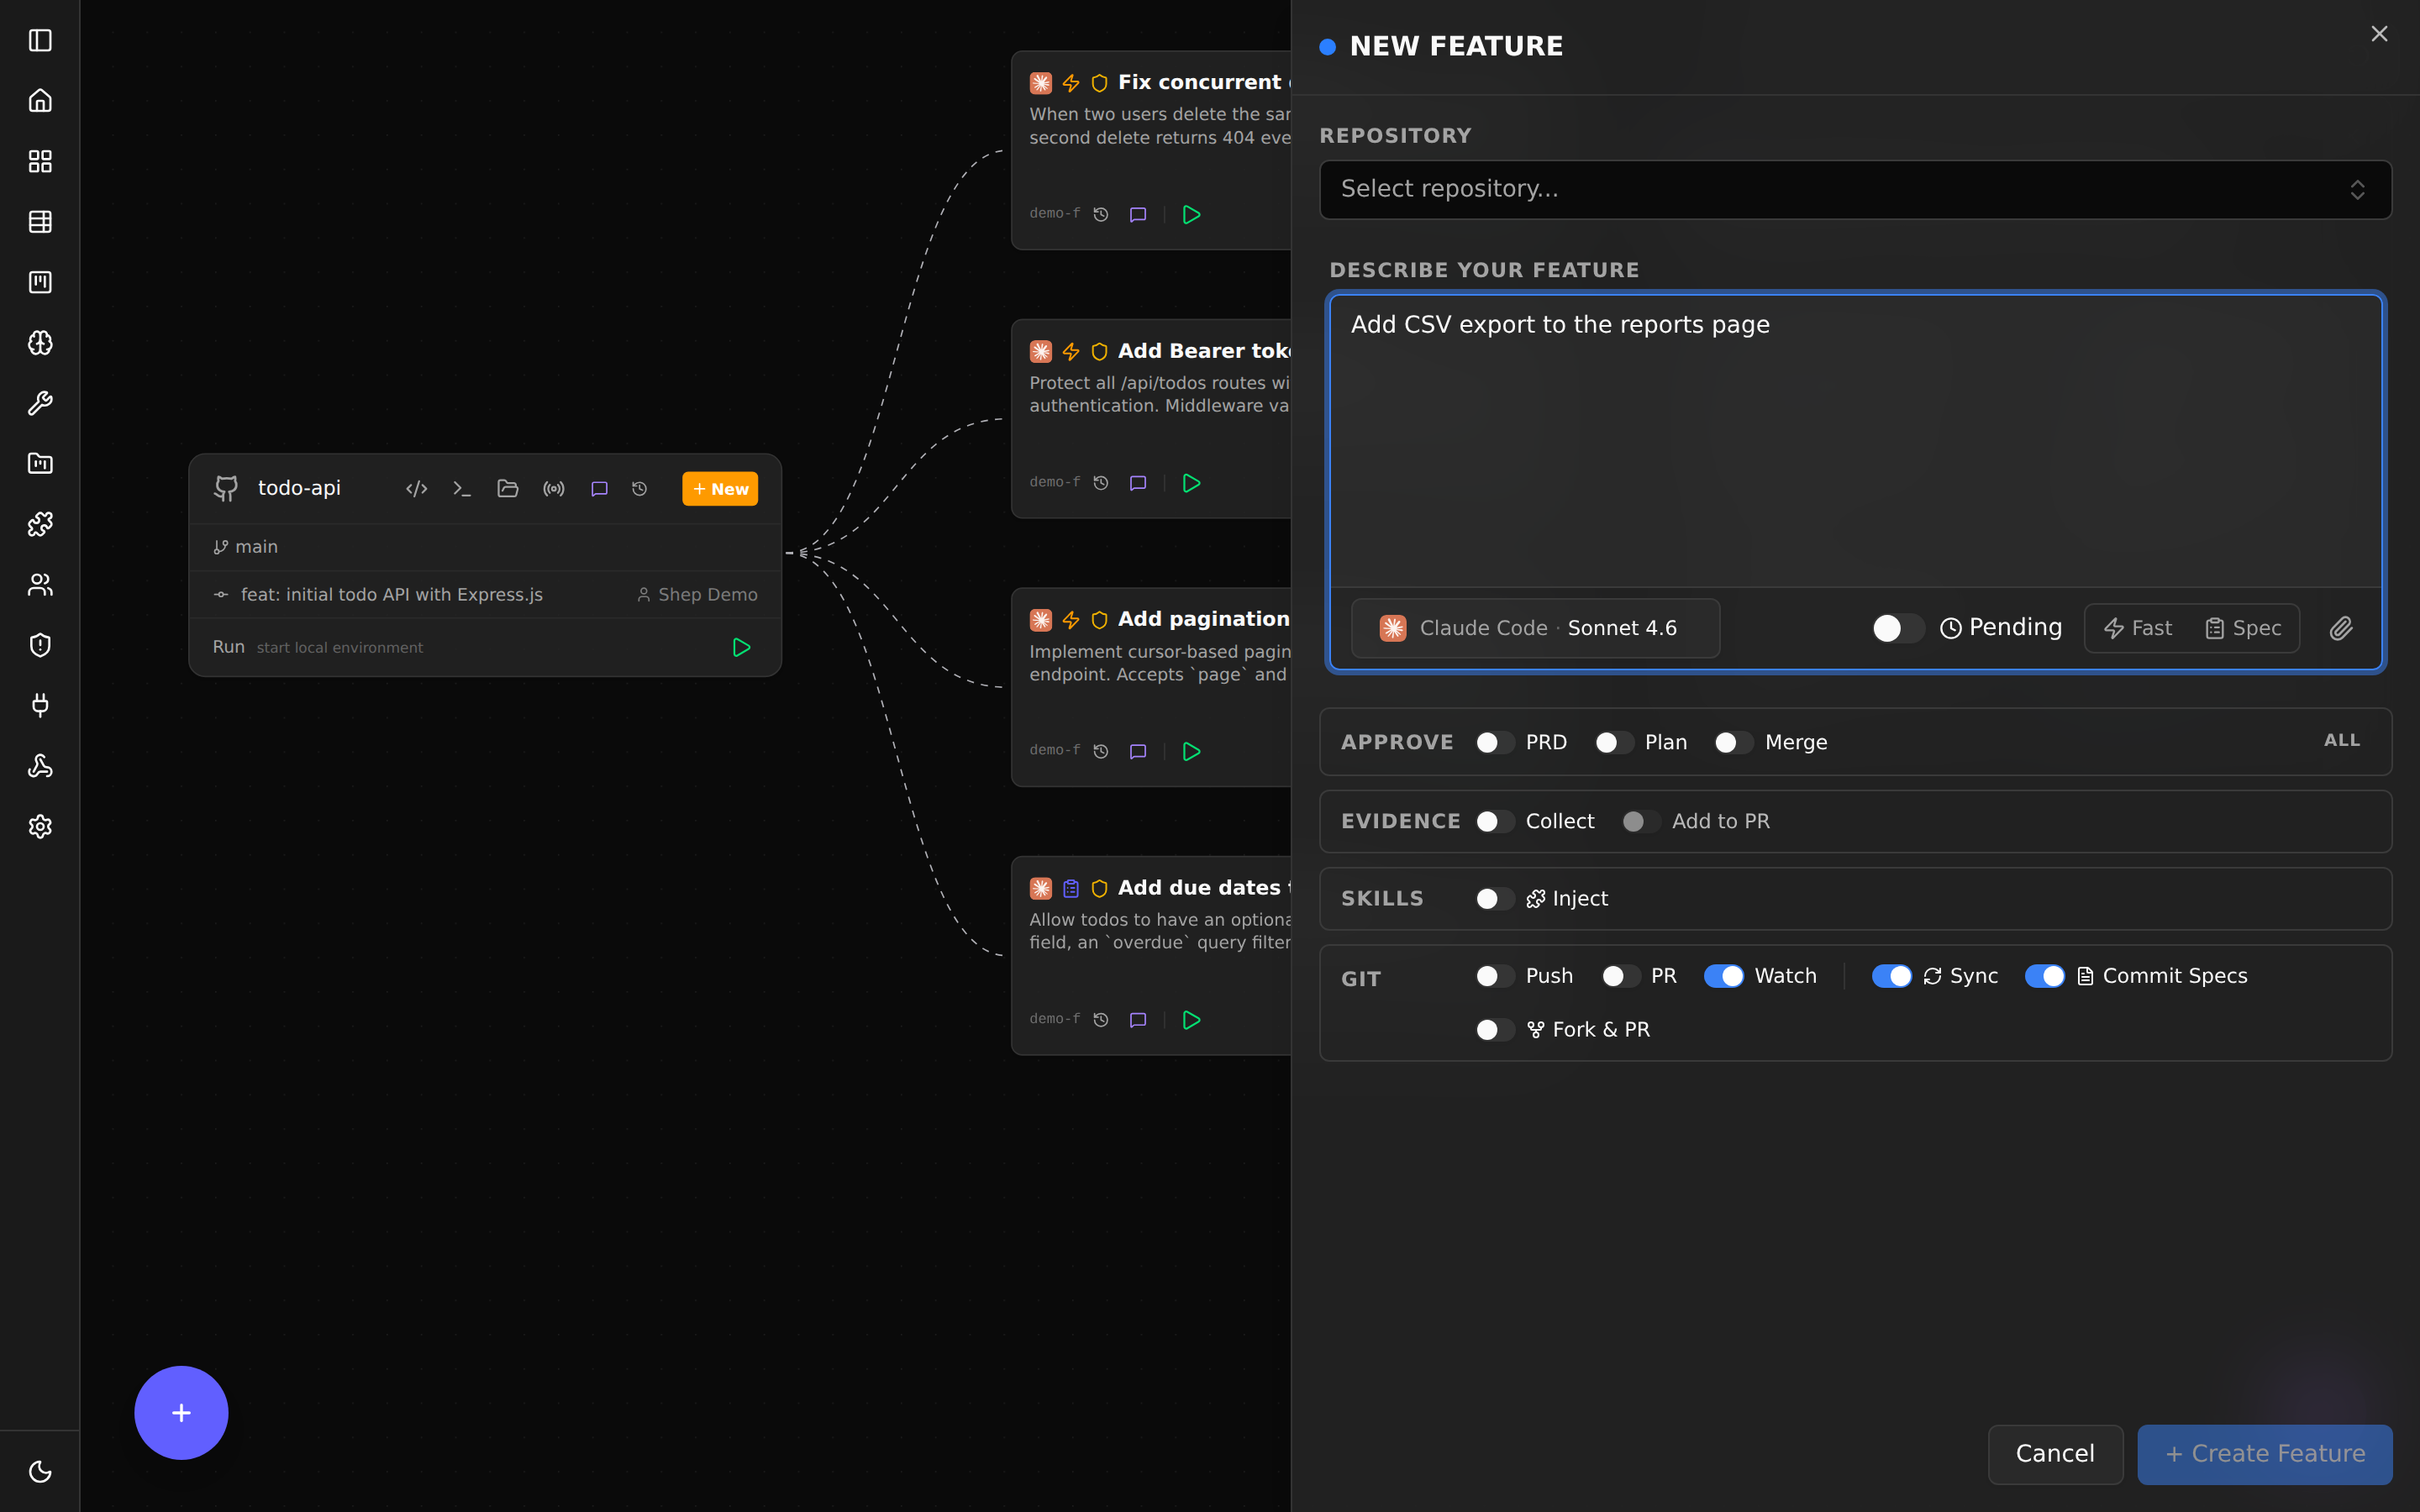
3. Describe what you want built
Pick something small and concrete for your first run. Examples:
"add a /health endpoint that returns uptime and version""add a 'Last updated' timestamp to the user profile page""convert the README quick-start section into a markdown table"
Specific is better. The agent does its best work when the prompt names the file or behavior clearly.
4. Run it
From the terminal:
shep feat new "add a /health endpoint that returns uptime and version" --push --prOr click + New Feature in the dashboard and type the same description.
5. Watch it work
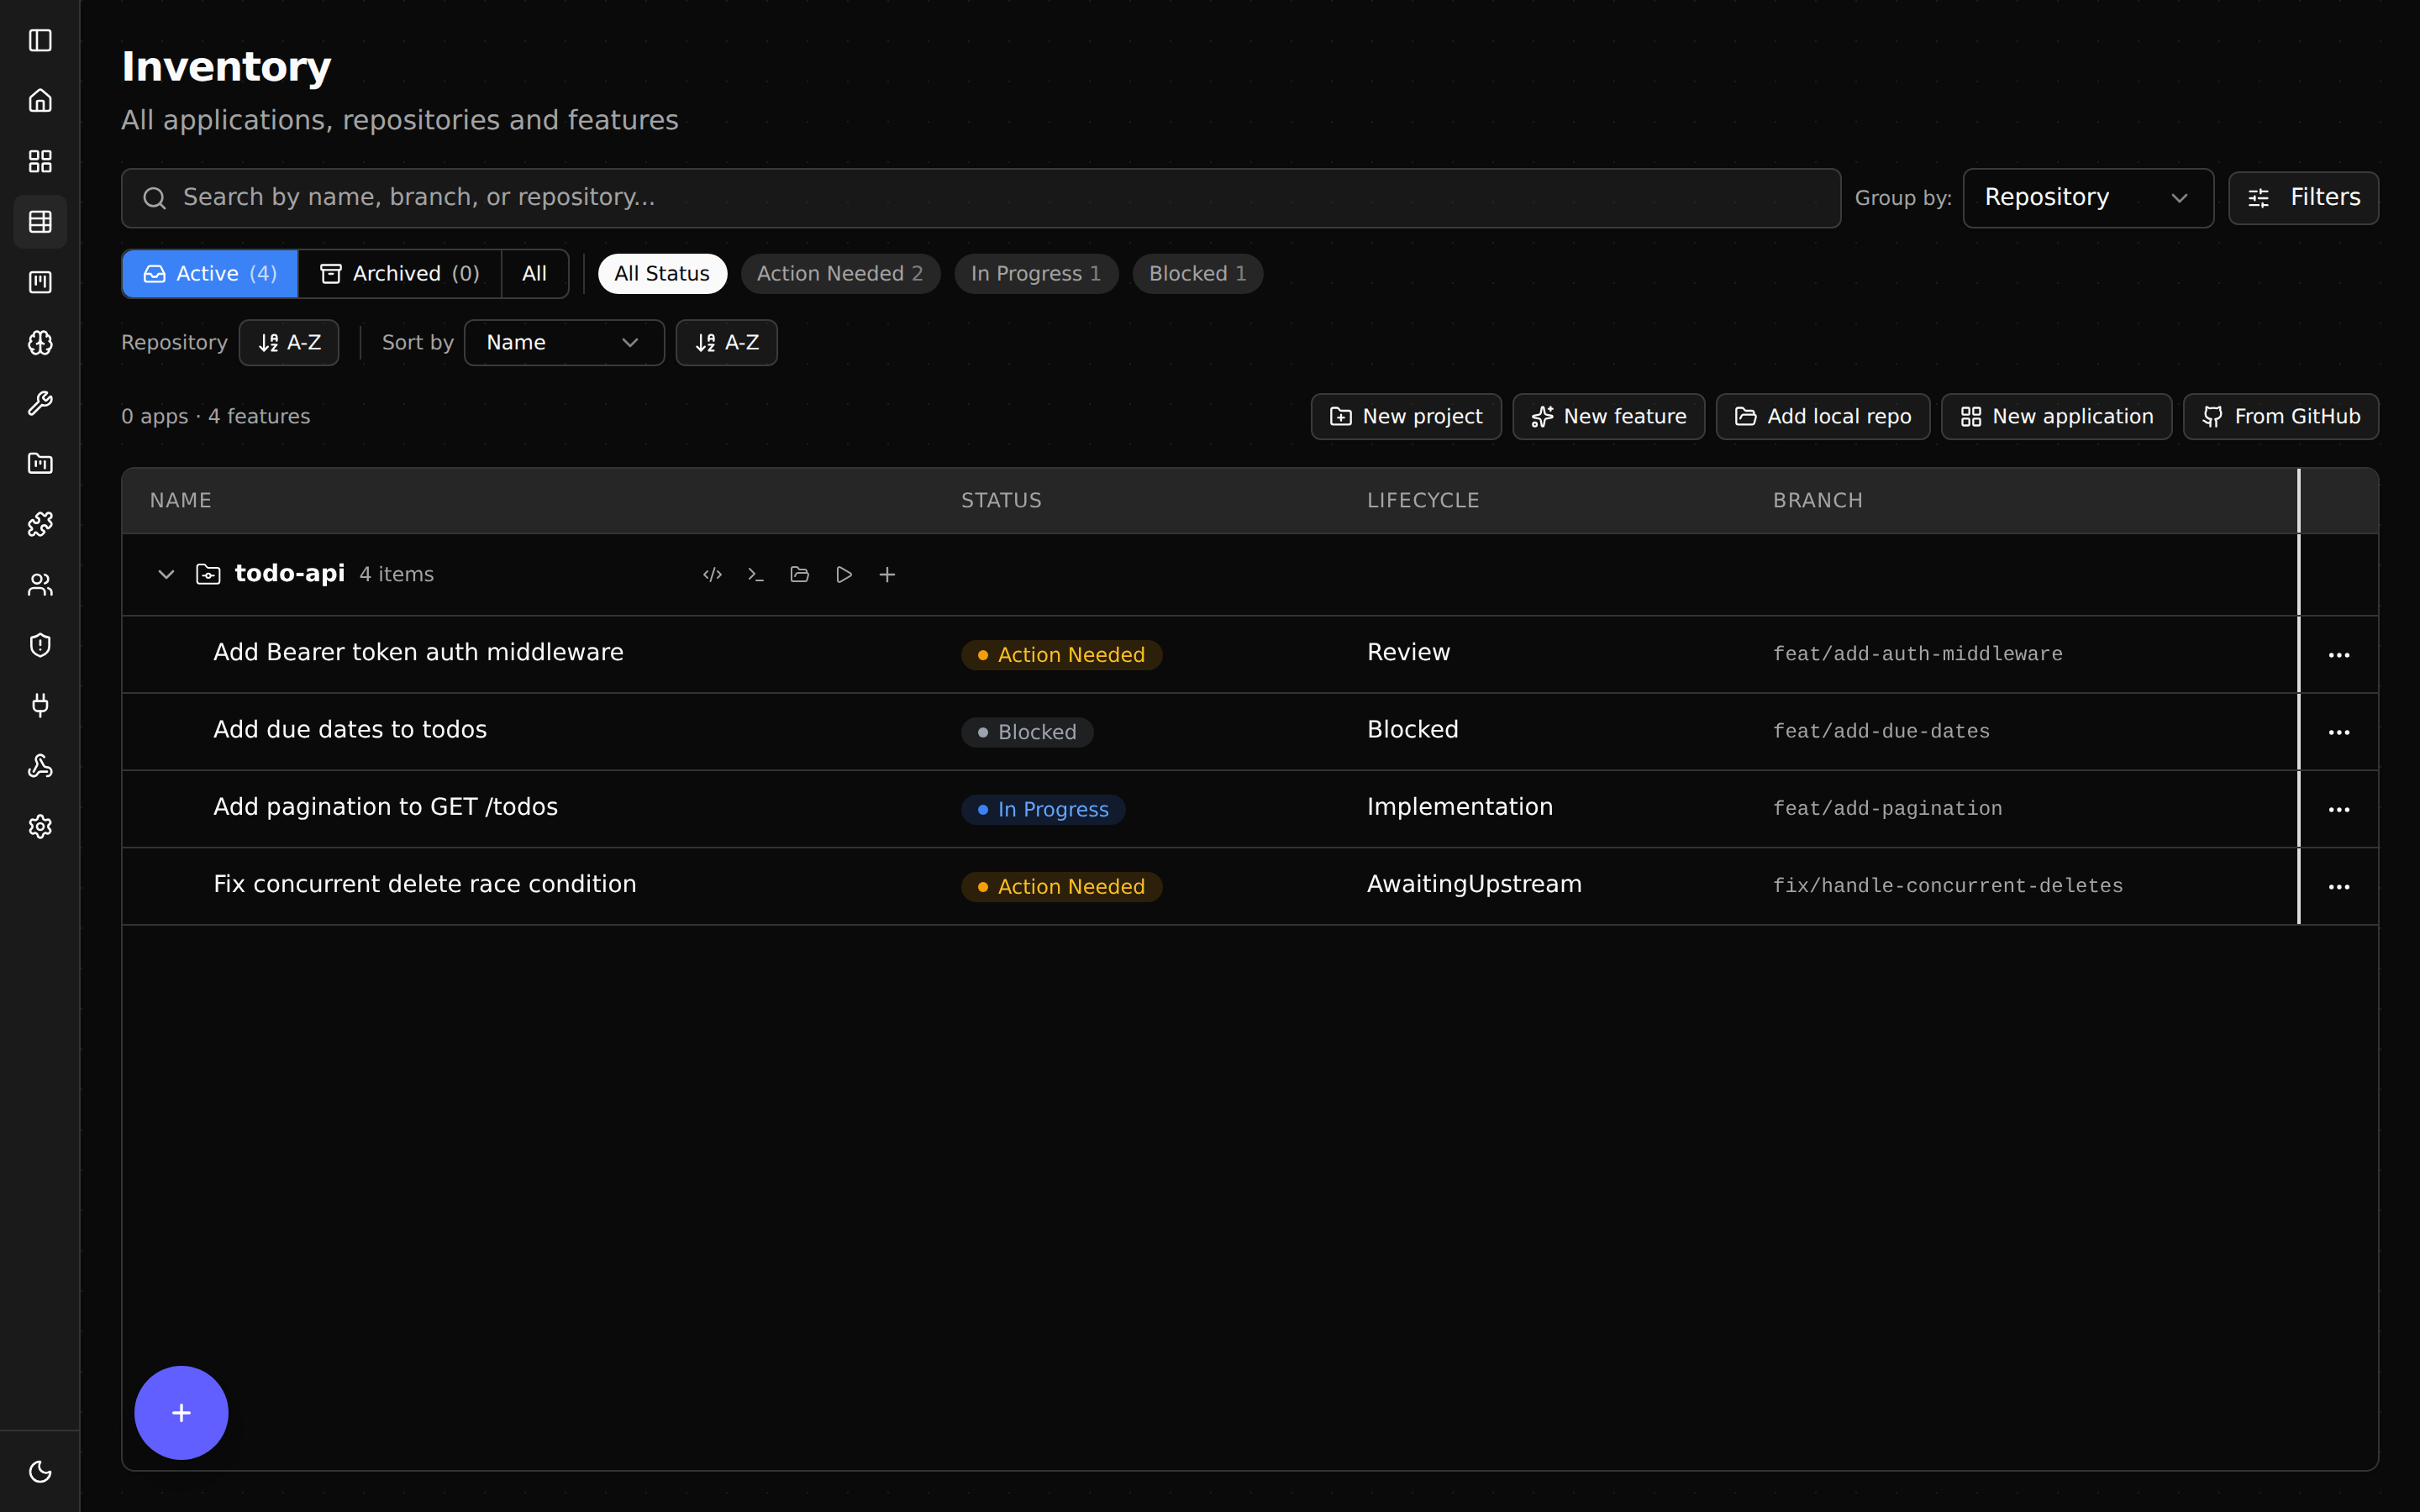
Open the dashboard if it’s not already up. You’ll see your feature appear in the sidebar with a status indicator.
Click the feature to open the detail view:
- Activity log — every commit, every push, every CI event.
- Live agent output — what the AI agent is doing right now.
- Diff viewer — the changes the agent has made so far.
- Chat — ask the agent questions or send a follow-up prompt.
You can keep coding on main while this happens. The agent is working in a worktree under ~/.shep/.
6. Review the PR
When the agent finishes, Shep pushes the branch and opens a draft PR on GitHub. You’ll see a link in the dashboard.
Open the PR. Review the diff like any other PR — read the code, check the tests, leave comments. The agent followed your repo’s conventions because Shep gave it the codebase analysis as context.
7. Approve and merge
If the diff looks good and CI is green, mark the PR ready and merge it.
If you want changes, you have several options:
- Comment on the PR —
shep feat resume <id>then chat with the agent in the dashboard about the requested changes. - Take over manually — the worktree is a normal git checkout. Open it in your IDE, make changes, commit and push.
- Reject the feature —
shep feat reject <id> --feedback "..."and Shep will retry with your guidance.
What you just experienced
In one command you got:
- A feature branch, named for what it does.
- A clean commit history.
- A draft PR with code and tests.
- CI watching itself, with auto-fix on failure.
- A worktree you can take over from at any point.
Now scale it. Try running three at once:
shep feat new "add a 404 page" --push --pr
shep feat new "fix the broken footer link" --push --pr
shep feat new "switch the homepage banner to use the brand color" --push --pr
All three run in parallel. None of them touches your main checkout.
What’s next
- Web Dashboard — every panel explained.
- CI Watch & Auto-Fix — what happens after the PR opens.
- Configuration — set defaults so you stop typing the same flags.