Getting Started
After this guide you’ll have Shep installed, your first feature implemented, and a draft PR open — typically in under five minutes.
Prerequisites
Before installing Shep, make sure you have:
- Node.js 22+ —
node --versionshould printv22or higher. - Git —
git --version. - GitHub CLI (
gh) — install guide . Rungh auth loginonce. - An AI coding agent on your PATH, already authenticated:
- Claude Code —
claude(recommended) - Cursor CLI —
cursor - Gemini CLI —
gemini
- Claude Code —
If your agent prompts you to log in, complete that yourself first. Shep cannot authenticate on your behalf — it just orchestrates the agent you already use.
Install Shep
The fastest way is npx:
npx @shepai/cliOr install globally:
npm install -g @shepai/cliStart Shep
From any git repo (or any directory — Shep will git init if needed):
cd your-project
shep
The first run launches a setup wizard. You pick your AI coding agent, your IDE, and your default workflow (push, PR, auto-merge). Settings are saved globally to ~/.shep/ and apply to every repo until you change them.
When the wizard finishes, Shep starts the daemon and opens the web dashboard at localhost:4050 .
Create your first feature
You can start a feature from the terminal or the dashboard.
From the terminal:
shep feat new "add a /health endpoint that returns uptime and version" --push --prFrom the dashboard:
Open localhost:4050 , click + New Feature, describe what you want, choose your automations (push, PR), and click Create.
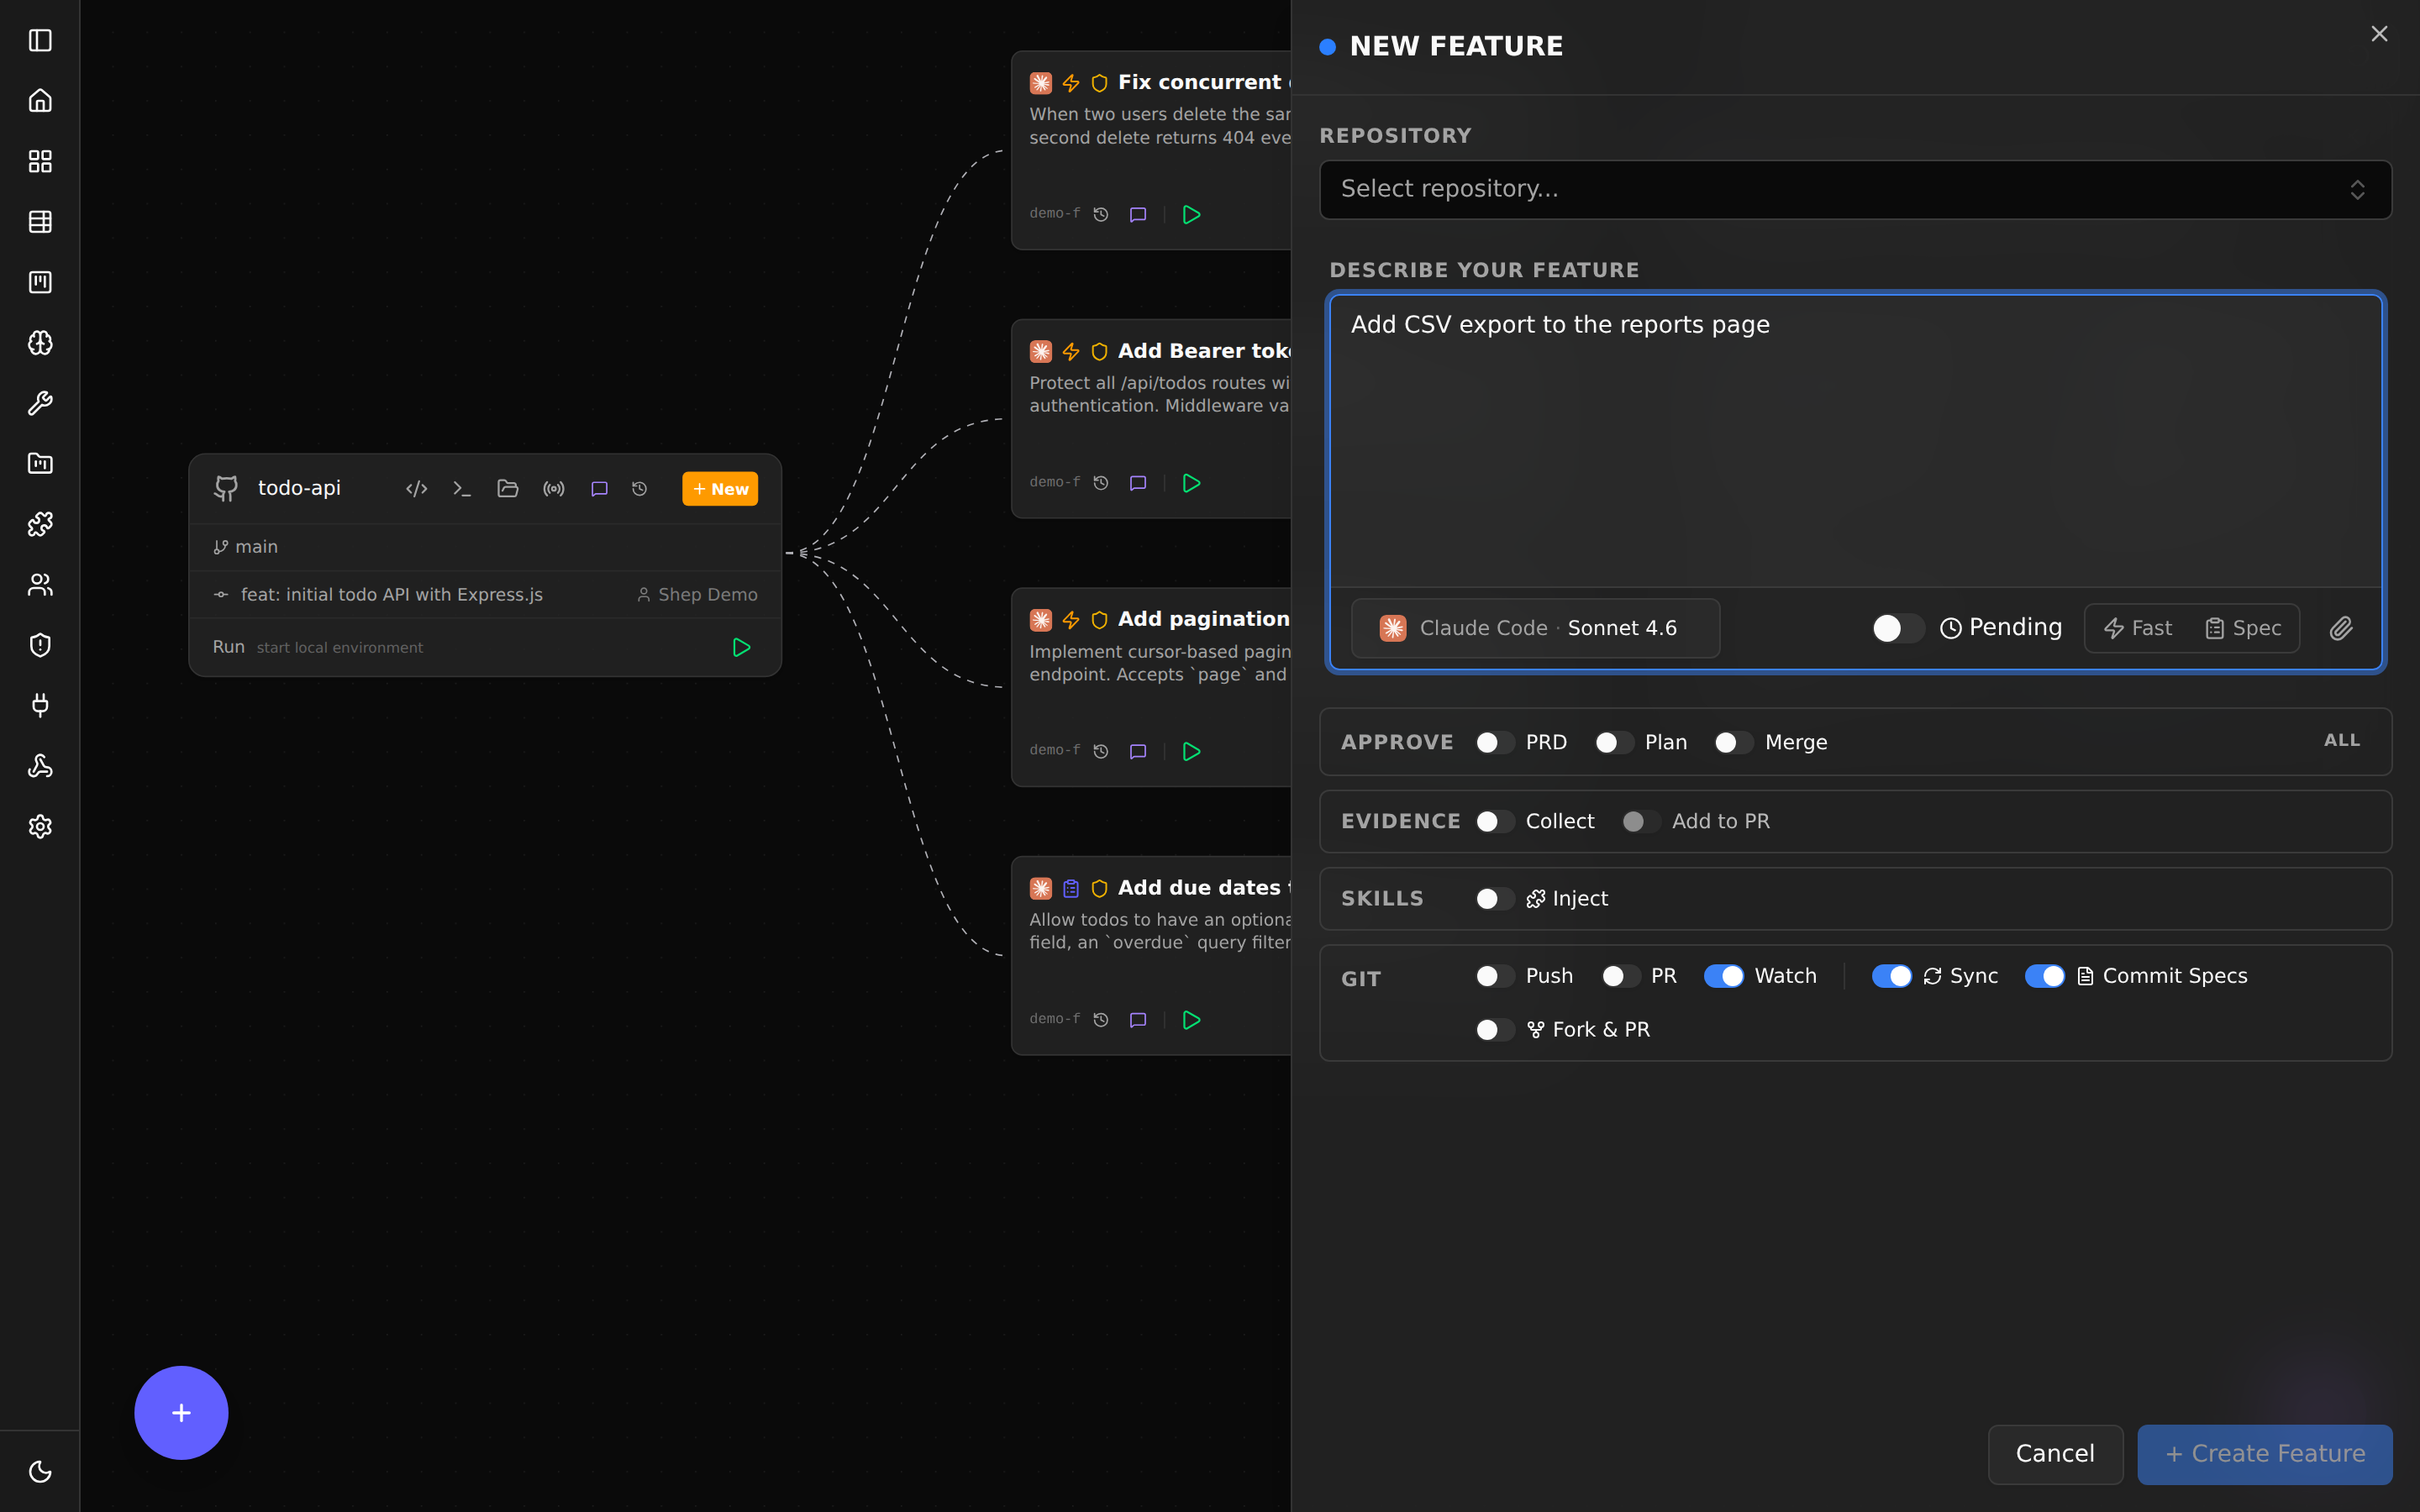
Either way Shep:
- Creates a git worktree on a new branch (e.g.
feat/add-a-health-endpoint). - Hands the prompt and repo context to your AI agent.
- The agent codes and writes tests inside the isolated worktree.
- Shep commits the work, pushes the branch, and opens a draft PR.
- If CI fails, Shep reads the logs, asks the agent to fix, and pushes again (configurable, default 3 retries).
You stay on main the whole time.
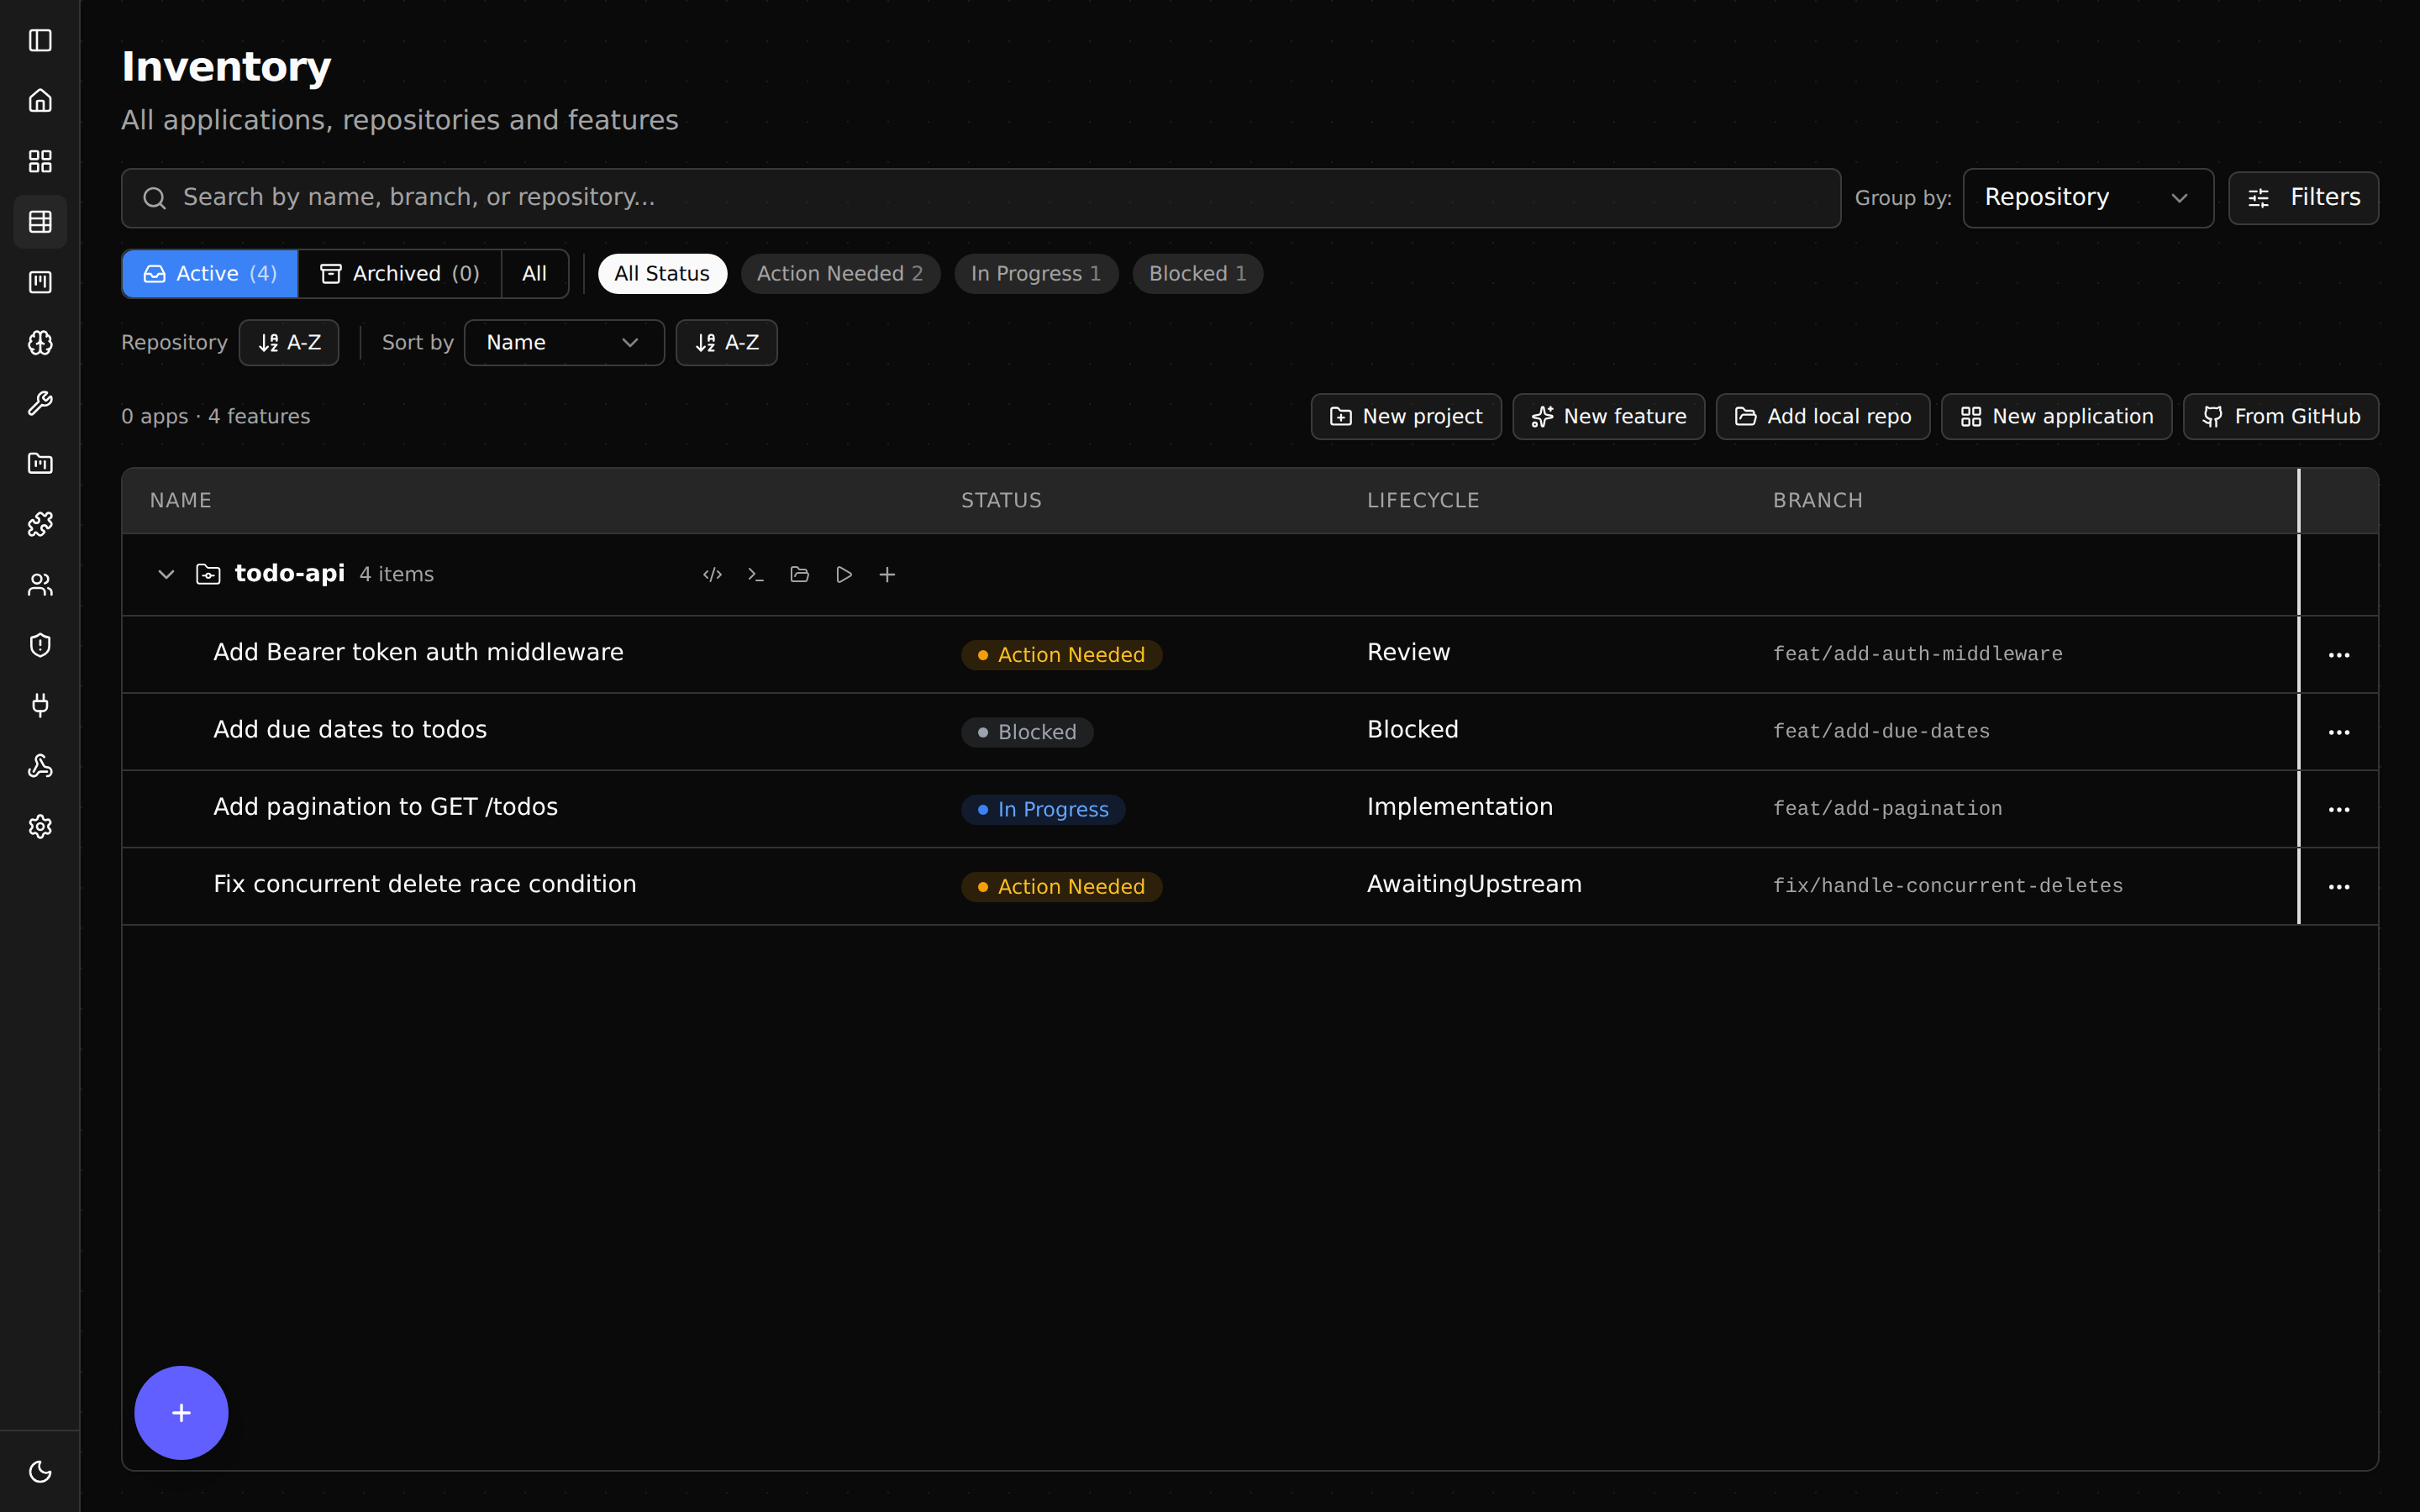
Go parallel
Shep’s superpower is running many features at once. Each feature is fully isolated in its own worktree, so they cannot conflict:
shep feat new "add stripe payments" --push --pr
shep feat new "add dark mode toggle" --push --pr
shep feat new "fix login redirect bug" --push --pr
Three agents working in three separate worktrees, each opening its own draft PR when done. Watch them in the dashboard or with shep feat ls.
Useful flags
shep feat new is configurable. The most-used flags:
| Flag | Effect | Default |
|---|---|---|
--push | Push the feature branch when implementation completes | from shep settings |
--pr | Open a draft pull request (implies --push) | from shep settings |
--no-pr | Skip the PR even if your default workflow opens one | — |
--fast | Skip spec-driven phases — go straight to implementation | on |
--no-fast | Use the full spec-driven pipeline (see Spec-Driven Mode) | — |
--allow-merge | Auto-merge the PR after CI passes | off |
--allow-all | Enable every automation (--push --pr --allow-merge and more) | off |
--model <id> | Override the agent’s default model for this feature | agent default |
--attach <path> | Attach reference files (designs, examples) to the prompt | — |
--repo <path> | Run against a different repo without cd | current repo |
Run shep feat new --help for the complete list.
Where to next
- How Shep Works — the worktree model in plain English.
- Web Dashboard — every panel and what it does.
- Configuration — set defaults so you stop typing the same flags.
- CLI Reference — every command, every flag.
- Troubleshooting — common setup hiccups.