Web Dashboard
The web dashboard is a visual front-end for Shep — same powers as the CLI but with diff viewers, live agent output, and chat.
Starting the dashboard
shep              # starts the daemon and opens the dashboard
shep ui           # opens just the dashboard (daemon must be running)
shep status       # check whether the daemon is running
By default it runs at localhost:4050 . Override the port:
SHEP_PORT=8080 shep
shep ui --port 8080
Layout
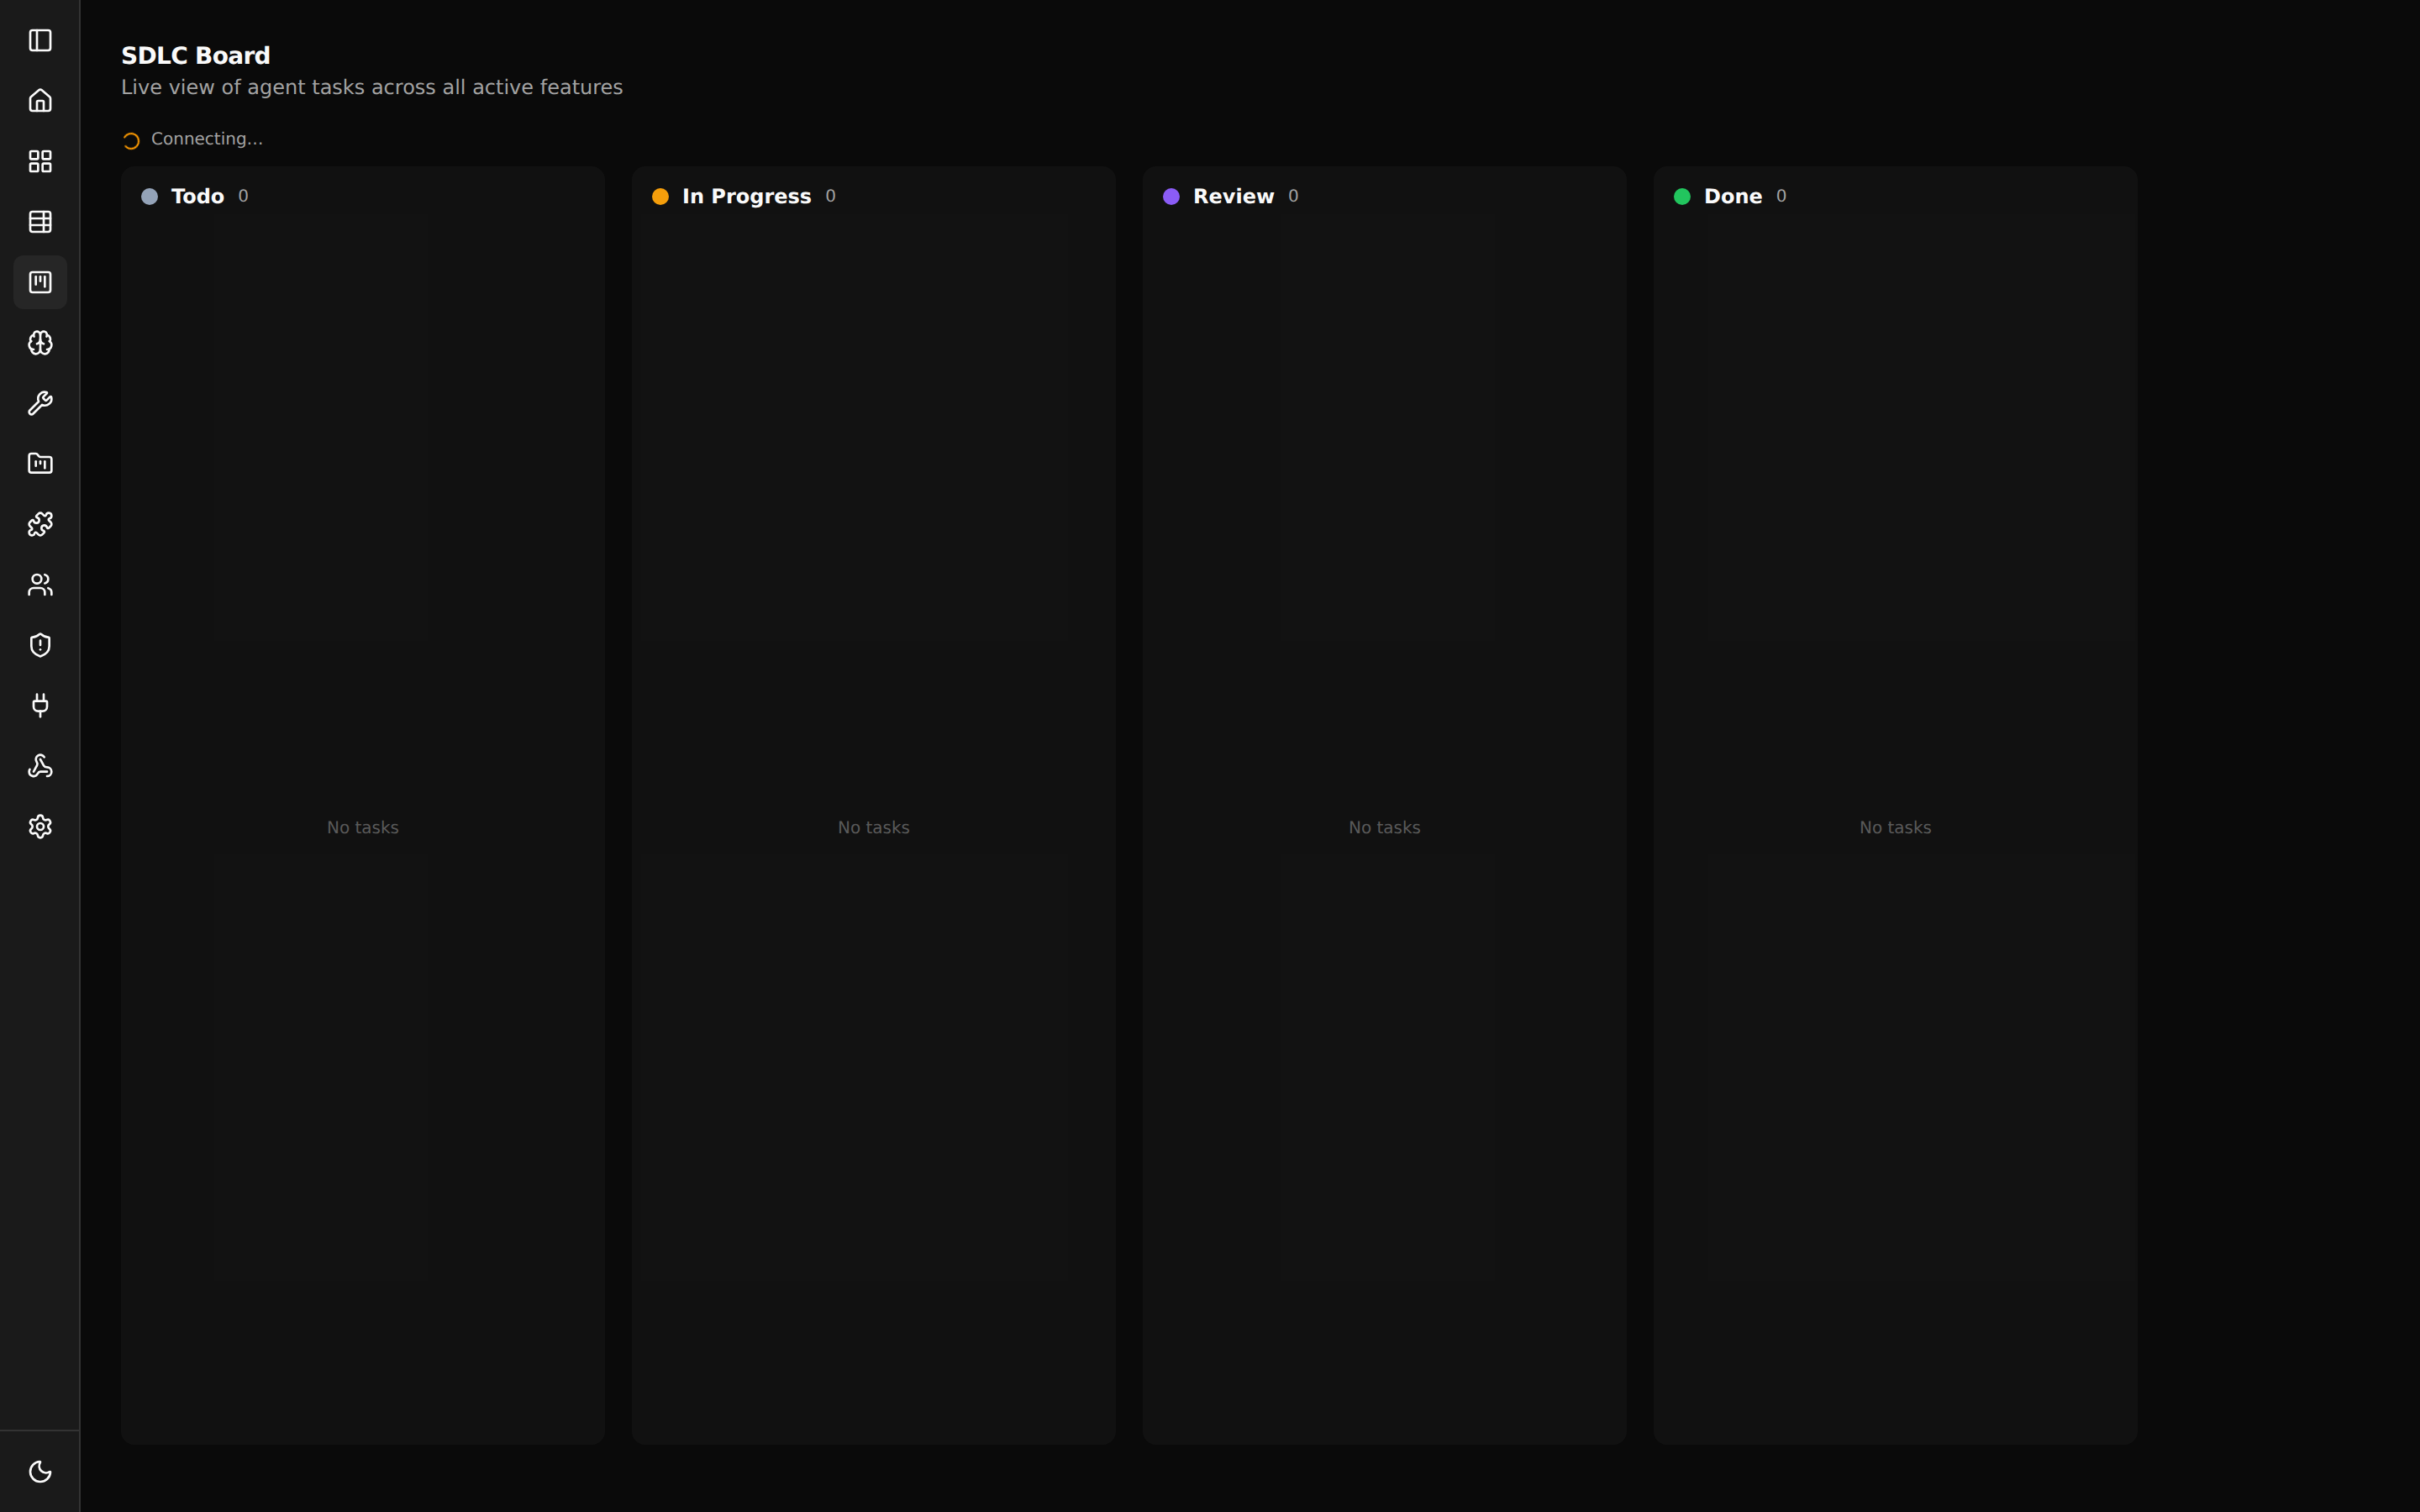
The dashboard has three main areas:
- Header — Shep logo, repo selector, settings, help.
- Sidebar — every feature in the current repo. The selected feature opens in the main pane.
- Main pane — content depends on what’s selected: feature detail, plan view, settings, etc.
Creating a feature
- Click + New Feature at the bottom of the sidebar.
- Describe what you want built. Shep can suggest contextual ideas based on your repo.
- Set automation toggles — push, PR, allow-merge, fast / spec-driven.
- Optionally attach reference files (designs, examples).
- Click Create.
Shep starts work immediately. The feature appears in the sidebar with a live status indicator.
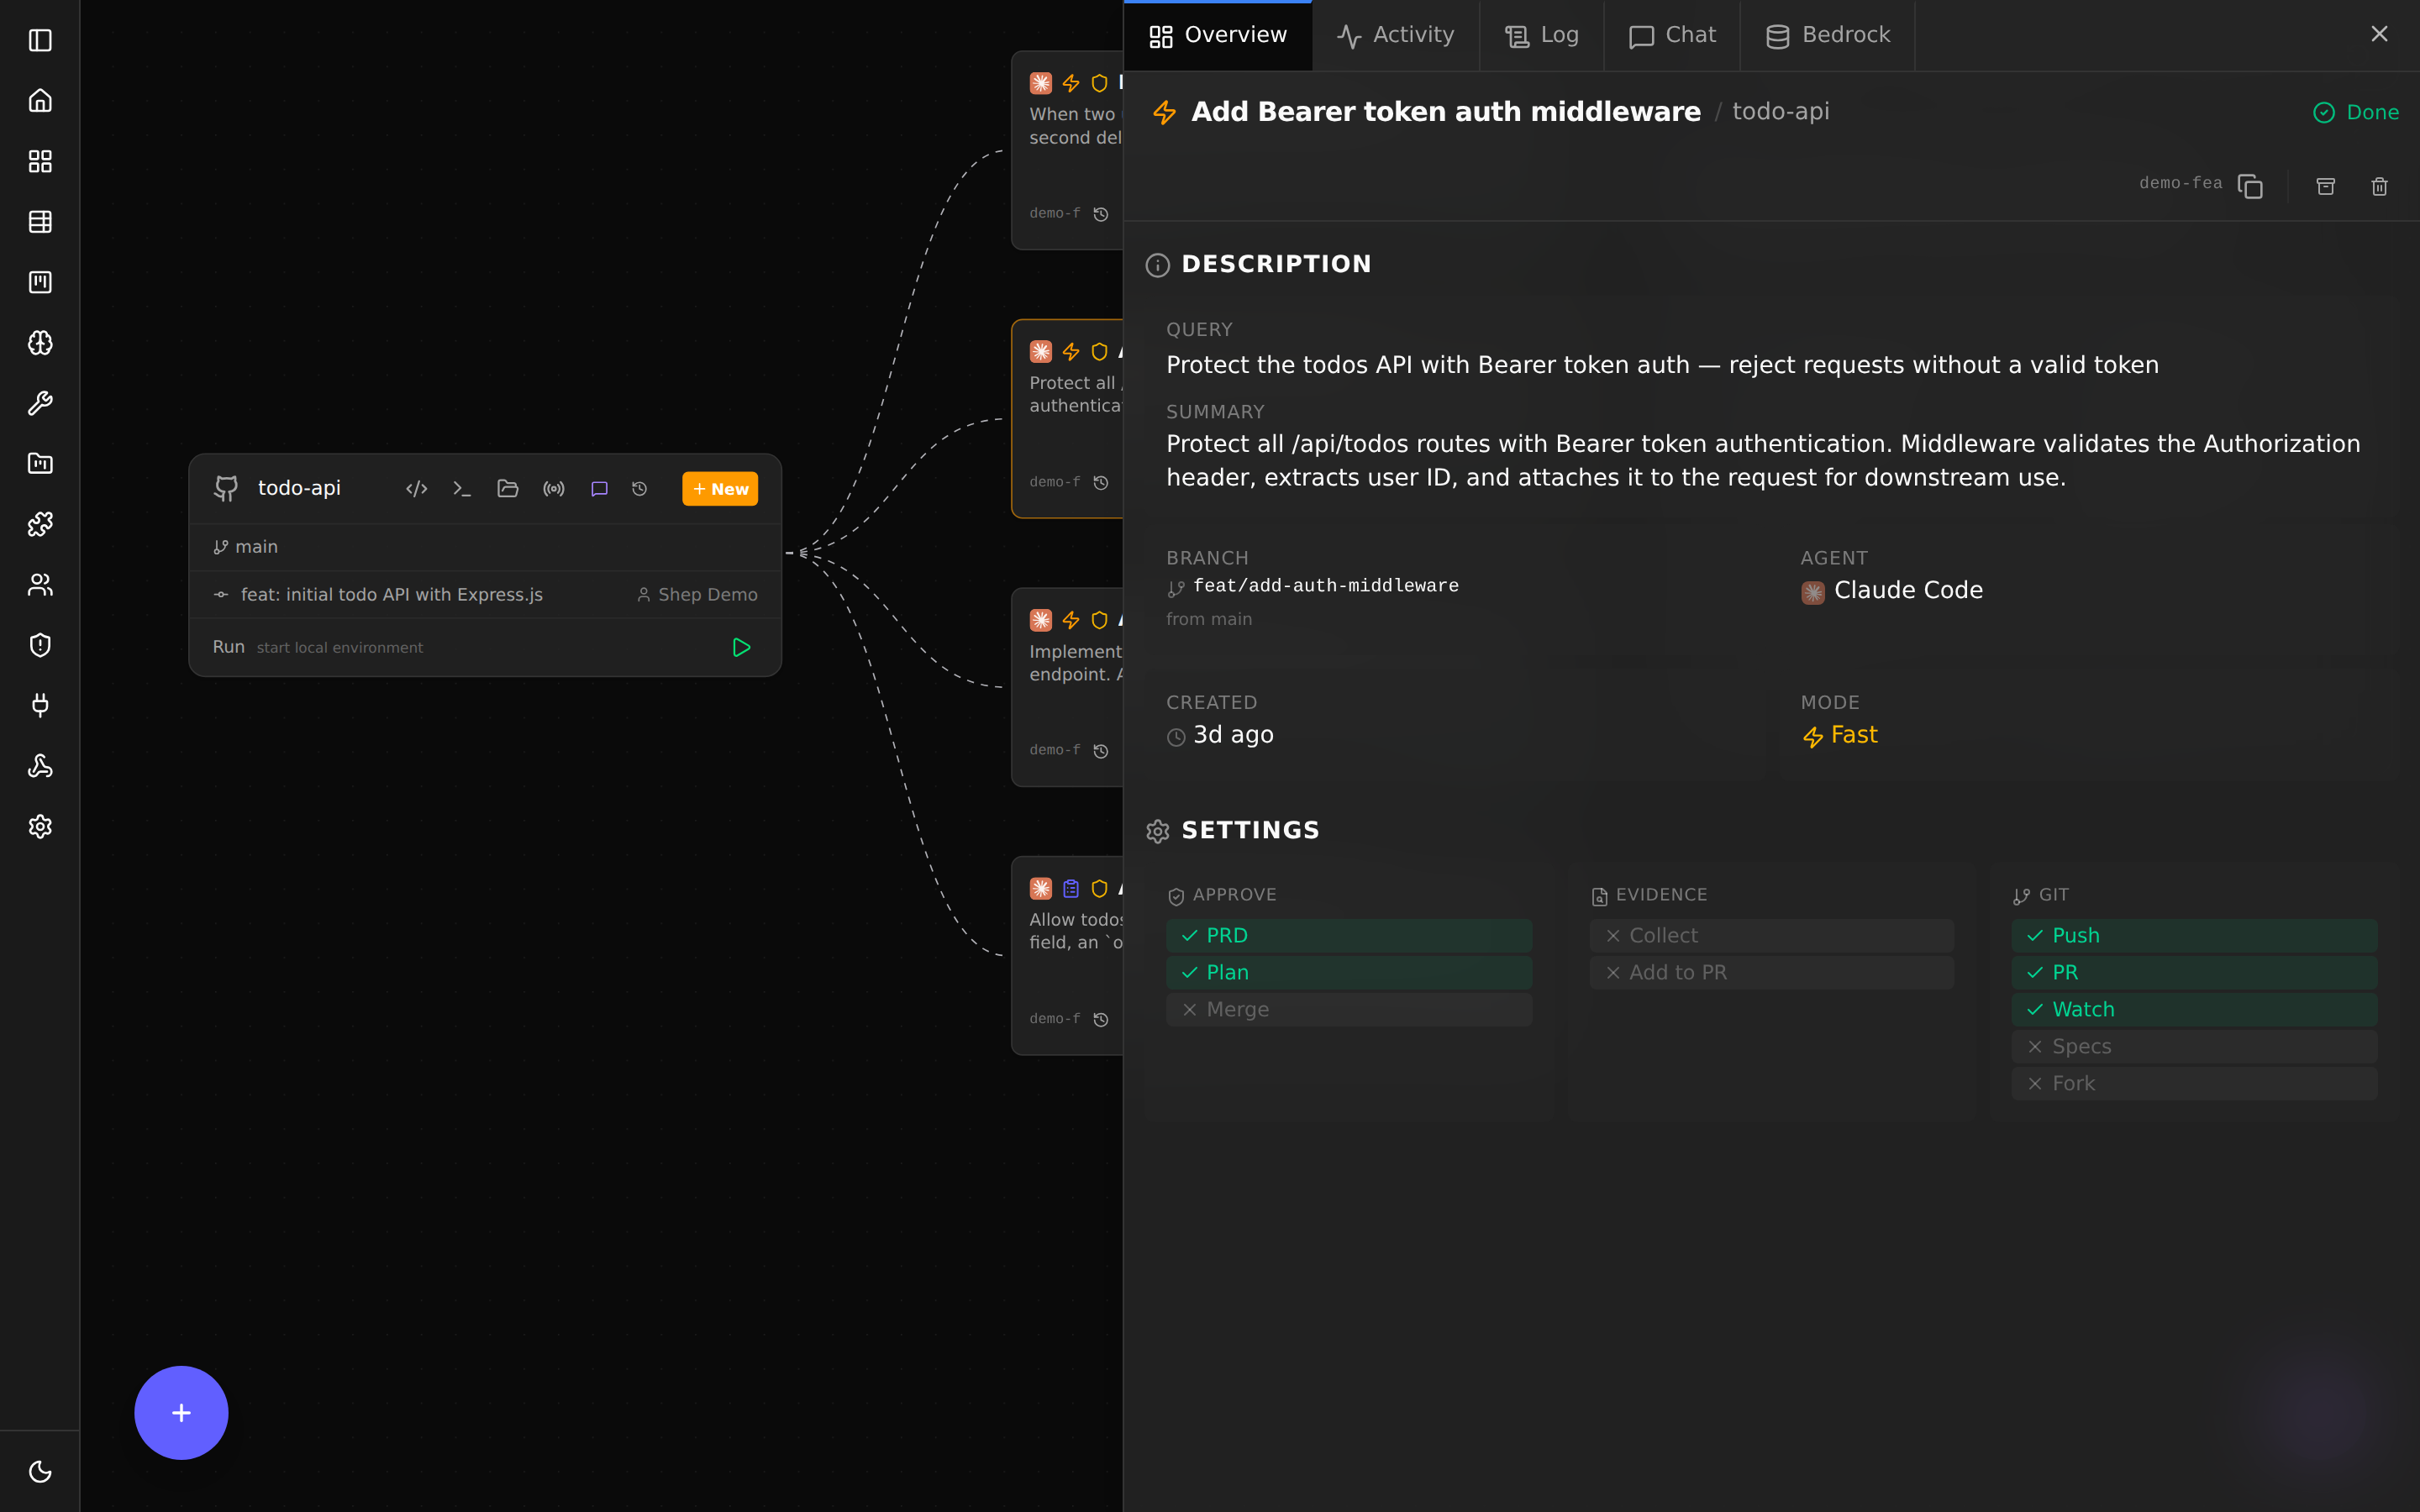
Feature detail view
Click any feature in the sidebar to open the detail view:
- Status header — current phase, branch name, agent name, model.
- Activity log — every commit, push, CI event, and phase transition.
- Live agent output — what the agent is producing right now.
- Diff viewer — see the agent’s changes file-by-file. Toggle between split / unified.
- Chat — ask the agent questions, send a follow-up prompt, request revisions.
- Controls — Pause, Resume, Stop, View in IDE, Open Terminal, Open in File Manager.
Spec-driven view
When a feature is in spec-driven mode (--no-fast), the detail view adds three tabs:
| Tab | Content |
|---|---|
| Tasks | The plan — epics, stories, subtasks. Expand any item for detail. |
| Documentation | Generated artifacts: PRD, technical design, etc. |
| Requirements | The full requirements list for reference. |
You can edit the plan inline before approving. Approval moves the feature to the next phase.
Multi-repo view
If you’ve added more than one repo to Shep, the header has a repo switcher. Pick “All repos” to see every feature across every repo in one list. See Multi-Repo for setup.
Chat & HTML preview
Every feature has a chat panel where you can ask the agent questions (“why did you choose this approach?”, “can you also add tests for the edge case where X?”). The agent replies inline.
If your repo builds an HTML preview (e.g. a static site or Storybook), the chat can render the preview directly so you don’t have to alt-tab.
Settings
Click the gear icon in the header:
- Theme — Light, Dark, System.
- Workflow defaults — push, PR, allow-merge, fast vs spec-driven.
- Agent — Claude / Cursor / Gemini, plus model overrides.
- Server — port, log level.
- Advanced — view daemon logs, clear cache, reset all settings.
These are equivalent to running shep settings in the terminal.
Stopping work
Every in-progress feature has a Stop button in the detail view. Click it and Shep:
- Tells the agent to finish its current operation.
- Marks the feature as paused.
- Leaves the worktree intact.
Resume anytime with shep feat resume <id> or the Resume button.
Keyboard shortcuts
| Shortcut | Action |
|---|---|
Cmd/Ctrl + N | New feature |
Cmd/Ctrl + K | Open the command palette |
Cmd/Ctrl + Enter | Submit chat message |
Esc | Close modal or cancel current input |
? | Show all keyboard shortcuts |
When to use the dashboard vs the CLI
- Use the dashboard for diffing changes, watching live output, chatting with the agent, and managing many in-flight features visually.
- Use the CLI for scripting, quick one-offs, or when you’re already in the terminal.
They are two views of the same system. Anything you can do in one, you can do in the other.
What’s next
- CI Watch & Auto-Fix — what happens after the PR opens and CI runs.
- Spec-Driven Mode — use approval gates for larger or higher-risk features.
- Configuration — set workflow defaults so you stop typing the same flags.